Sometimes I’m called upon to install Samsung mortise locks that customers have purchased from Amazon. These are not my favorite locks to install and I would not install one in my own home.
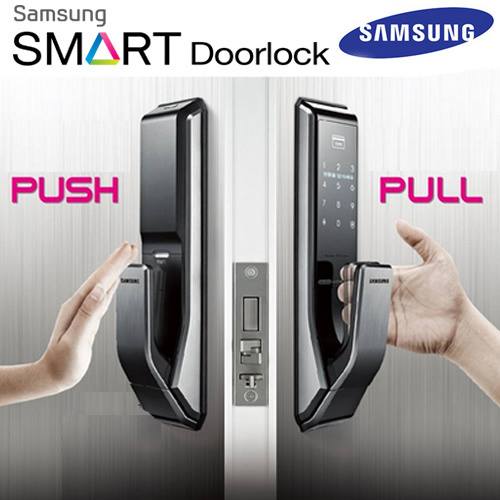
Samsung offers a variety of sleek digital locks with lots of cool features, including keypad entry, RFID key fob entry, and fingerprint recognition. These locks look like they were designed for the set of Star Trek: The Next Generation. They’re like a 20th-century conception of a futuristic lock. And they usually work. As far as I can tell, none of them have the capability of wirelessly linking into a smart home system. I’m sure that’s coming.
My biggest qualm is that they require a nonstandard door preparation. If you don’t already have a Samsung mortise lock in your door, installing one will require some significant door modification. Regardless of what kind of lock you currently have, it will be necessary to put new holes in your door. If you currently have a standard mortise lock (made by Baldwin, Sargent, Corbin Russwin, etc.), you will also likely have to fill in some of the spaces that are already in the door to assure a snug fit. I suppose this would all be fine if you expected this lock to last for 100 years like those other ones would. But this is a piece of electronics you’d be mounting to your door. Just like with your laptop and your smart phone, it’s likely that in a few years you’d want a new model. Would you then have to stick to the Samsung line because that’s what your door is prepped for? Are you confident you’d still want this brand in a few years? Will Samsung still be selling locks by that time that require this same door prep? Unless you’re pretty comfortable with the idea of replacing your whole door with the next lock change, this should heavily influence your consideration of this line of locks.
I also doubt how focused on security the designers of these locks were. To their credit, these are mortise locks, which are typically more secure than the standard cylindrical locks we find on most doors. The backup key holes are located in a part of the lock that would make them hard to pick. Additionally, they cannot be bumped and the keys themselves are relatively hard to duplicate (which is not always a great thing). Finding someone to rekey the locks would be a particularly interesting challenge. The strikeplates for these locks are lightweight and come with very short screws. It’s certainly possible to install a heftier strikeplate and to secure it to the frame of the house using long screws. But the fact that this isn’t included with the lock makes me think that withstanding a brute-force attack is not the main purpose of these locks. And as far as I can tell, none of these locks have been scored by the American National Standards Institute (ANSI), which is the principal authority for rating locks.
Although Samsung’s locks are packed with cool features and aesthetic appeal, the actual security they provide does not justify their high cost, the difficulty of installation, and the problems you encounter when you want to replace them.
So your deadbolt is sticky, is it? Let’s see if we can do something about that.
STEP 1
Check to see if there’s molasses all over your lock. Molasses is water soluble. Try cleaning it with a damp rag. If the lock doesn’t have molasses all over it, then “sticky” is not a very telling description of the problem.
STEP 2
(The door should remain open throughout this step.)
Try operating the deadbolt from the inside, using the thumbturn. Does it work fine? Go to Step 3.
Is there resistance? Get a can of WD-40 with the red straw attached.
Remove one of the two screws holding the thumbturn in place. Squirt some WD-40 in that hole where the screw was, aiming for the bolt assembly inside the door. Don’t go crazy and empty the can in there; it’ll leak all over the place. A little dab’ll do ya.
Put the screw back in and extend the bolt. Squirt a bit of WD-40 on that bolt and then retract it back into the door, wiping up any excess liquid that wants to run down the edge of the door.
Try the thumbturn now. Is it working? Great! Go have a beer.
Is it still hard to work the deadbolt with the thumbturn while the door is open? If so, loosen both of those screws holding the thumbturn on, just enough so that you can slide the thumbturn about a quarter of an inch in any direction. With your left hand holding the circular edge of the thumburn and your right hand on the flippy thing (technical term), try shifting the thumbturn this way and that, and testing to see if you can find a position in which the flippy thing extends and retracts the bolt with ease. If you find a sweet spot, hold the thumbturn in place, tighten the screws back up, and test the lock again. Is it beer-thirty yet? If not, you can also try rotating the outside half of the lock (the part with the keyhole) this way and that while testing the flippy thing.
If no amount of lubrication or adjustment allows you to operate the thumbturn with ease, remove both of those screws and take the lock off the door, leaving the bolt assembly in place. Be careful not to drop either half of the lock onto your hardwood floor or concrete walkway.
Now look at the bolt assembly. Is any part of it obviously broken? If so, you need a new lock. If not, look for a + or – in the center of the bolt assembly and use your screwdriver to manually turn it one way or the other, extending or retracting the bolt. Can you work it easily? Is any moving part consistently hitting or rubbing up against a stationary piece of wood? If so, you need to resolve that somehow. If you can use the screwdriver to operate the bolt with ease, then I’m stumped. You’d better call a locksmith.
Now put your lock back together and have a beer while you consider your next move.
STEP 3
With the door still open, put the key into the keyhole. Did it go in smoothly?Good! Skip to Step 4.
If not, try some other keys. None of them go in? Spray some of that WD-40 into the keyhole. Did that fix the problem? Great! Go have a beer.
STEP 4
Keep the door open throughout all of Step 4.
Test to see if you can turn the key freely to easily extend and retract the bolt. If that works, go to Step 5.
If the key doesn’t turn freely, we’ll need to explore this problem. First, look at your key. Is the lock brand that’s printed above the keyhole also on the key? (That is, is this the original key that came with the lock?) If not, then this is a copy. Do you remember if this key was cut by a person who doubled as a stock clerk in a grocery store? If so, then, really, what did you expect?
The keyhole in this lock is situated in the lock cylinder. Do you see a tiny hole to the left of the keyhole, or a plus sign directly above the keyhole? No to both? Read on. Yes to one of those? Your cylinder is failing and it’s time to buy a new lock.
Imagine that this cylinder is a clock face and when you put the key in, it’s at 12 o’clock. Is the hardest part getting the key to turn from 12 o’clock to 1 o’clock, and after that it turns with
ease? Maybe you have to jiggle the key up and down just to get it turning? Your key is no good. Find a good copy of the key and go to a locksmith shop to get it copied—not Home Depot or Fred Meyer. Don’t have a good copy? Buy a new lock or call a locksmith.
Warning: This next paragraph is a little advanced and rarely relevant.
Is there a bit if resistance going from 12 o’clock to 1 o’clock, and also throughout the entire rotation of the key while the door is open? If so, turn the key to about 1 o’clock. Now you’re going to whack the key with the handle of your screwdriver. This is not a joke. Use a screwdriver you don’t care about, because you might ugly the handle a little. Don’t hit the face of the key head. You’re going to aim for the edge of the fully inserted key—the part that’s about 2.5mm in width. And you’re not going to hit the key such that you’re pushing it into the keyhole. Rather, you want to hit the top edge of the key and the bottom edge of the key—that is, swinging your screwdriver down toward the floor and up toward the ceiling, all the while holding the key at the 1 o’clock position. Try not to hit your fingers. Just a few short sharp raps in both directions should do it. Now turn the key. Does it work any more smoothly? Great! Pull the key out and inspect it. Look at the cuts as if you’re looking down into a mountain range. At the floors of the little valleys, do you see some divots? If not, forget about this and advance to Step 5. If so, then these cuts are not deep enough. You could take a tiny round file and lightly—carefully!—file away those little divots. If you file away too much or in the wrong place, then you’ll ruin the key. Proceed by repeating this process of whacking, filing, and testing the key until you’re satisfied with how it works. Did this actually work? Great! That’s worth two beers.
STEP 5
If your deadbolt works perfectly from both sides while the door is open but not while closed, you’ve got an alignment problem.
Look at the strikeplate—that’s the rectangular metal plate on the door frame with the hole in it, which the deadbolt goes into. Is it marked up? Note where the marks are.
Do the marks seem to be way down toward the bottom of the hole? If not, skip this paragraph. If so, close the door and look at the hinge side. Is the gap between the door and door frame larger at the top of the door than at the bottom of the door? That would indicate that the weight of your door has caused it to sag over time. See if you can open the door and tighten all the screws in the top hinge. Does that make any difference? Try loosening the screws in the bottom hinge just a bit—perhaps a quarter- to a half-turn for each screw. Any improvement?
Let’s test the lateral alignment. Standing inside, close the door as gently as you can until it just latches, and then don’t push it any farther. Without pushing or pulling on the door, turn the thumbturn. Does it work without resistance? Open the door back up and then slam it shut. Turn the thumbturn, again without pushing or pulling on the door as you do it. Is there resistance? If it works in one case and not the other, you could decide to always or never slam the door.
Now open the door and put your left hand on the doorknob and your right hand on the thumbturn. Turn the doorknob to retract the latch and hold it in that position as you simultaneously push the door closed and extend the deadbolt. (Read that sentence again; there’s lots going on here.) Is there some spot along the door’s path where the bolt easily enters the hole in the strikeplate? If so, the objective now is to get the lock to properly line up with the strike when the door is latched.
In order to achieve that, you have to adjust the latchplate. That’s the metal plate that the doorknob’s latch goes into to hold the door closed when the deadbolt is not engaged. This will determine how tightly the door will be held to the weather stripping when closed. Inside the latchplate there’s often a metal tab that can be bent in one direction or another with a pair of pliers. (You have to remove the plate from the jamb to do this.) Try adjusting that and then putting it back on the door jamb. But be careful! If you bend it back and forth too much, it’ll snap off. Sometimes no amount of adjusting that tab will do, and you just have to drill a couple of new holes and physically shift the latchplate over. Don’t get drill happy. Drill too many of these holes too close together and your screws won’t stay put. Another possibility is to file a bit of material off the inside of the strikeplate to widen the hole.
At this point, if you’ve identified the problem but don’t have the tools or skills to resolve it, you might want to call someone who is equipped to do so.
At least, I hope, we can agree that the lock is not sticky.
 Commercial


 ease? Maybe you have to jiggle the key up and down just to get it turning? Your key is no good. Find a good copy of the key and go to a locksmith shop to get it copied—not Home Depot or Fred Meyer. Don’t have a good copy? Buy a new lock or call a locksmith.
